
CookieScript already lets you change quite a lot — colors, layouts, and even which parts of the cookie banner show up. For most sites, that covers the basics.
But if you want the banner to match your brand more closely (or you just have a specific look in mind), you might need something extra, like your own fonts or border styles.
For those cases, CookieScript includes a Custom CSS option.
Here’s how to find it and use it:
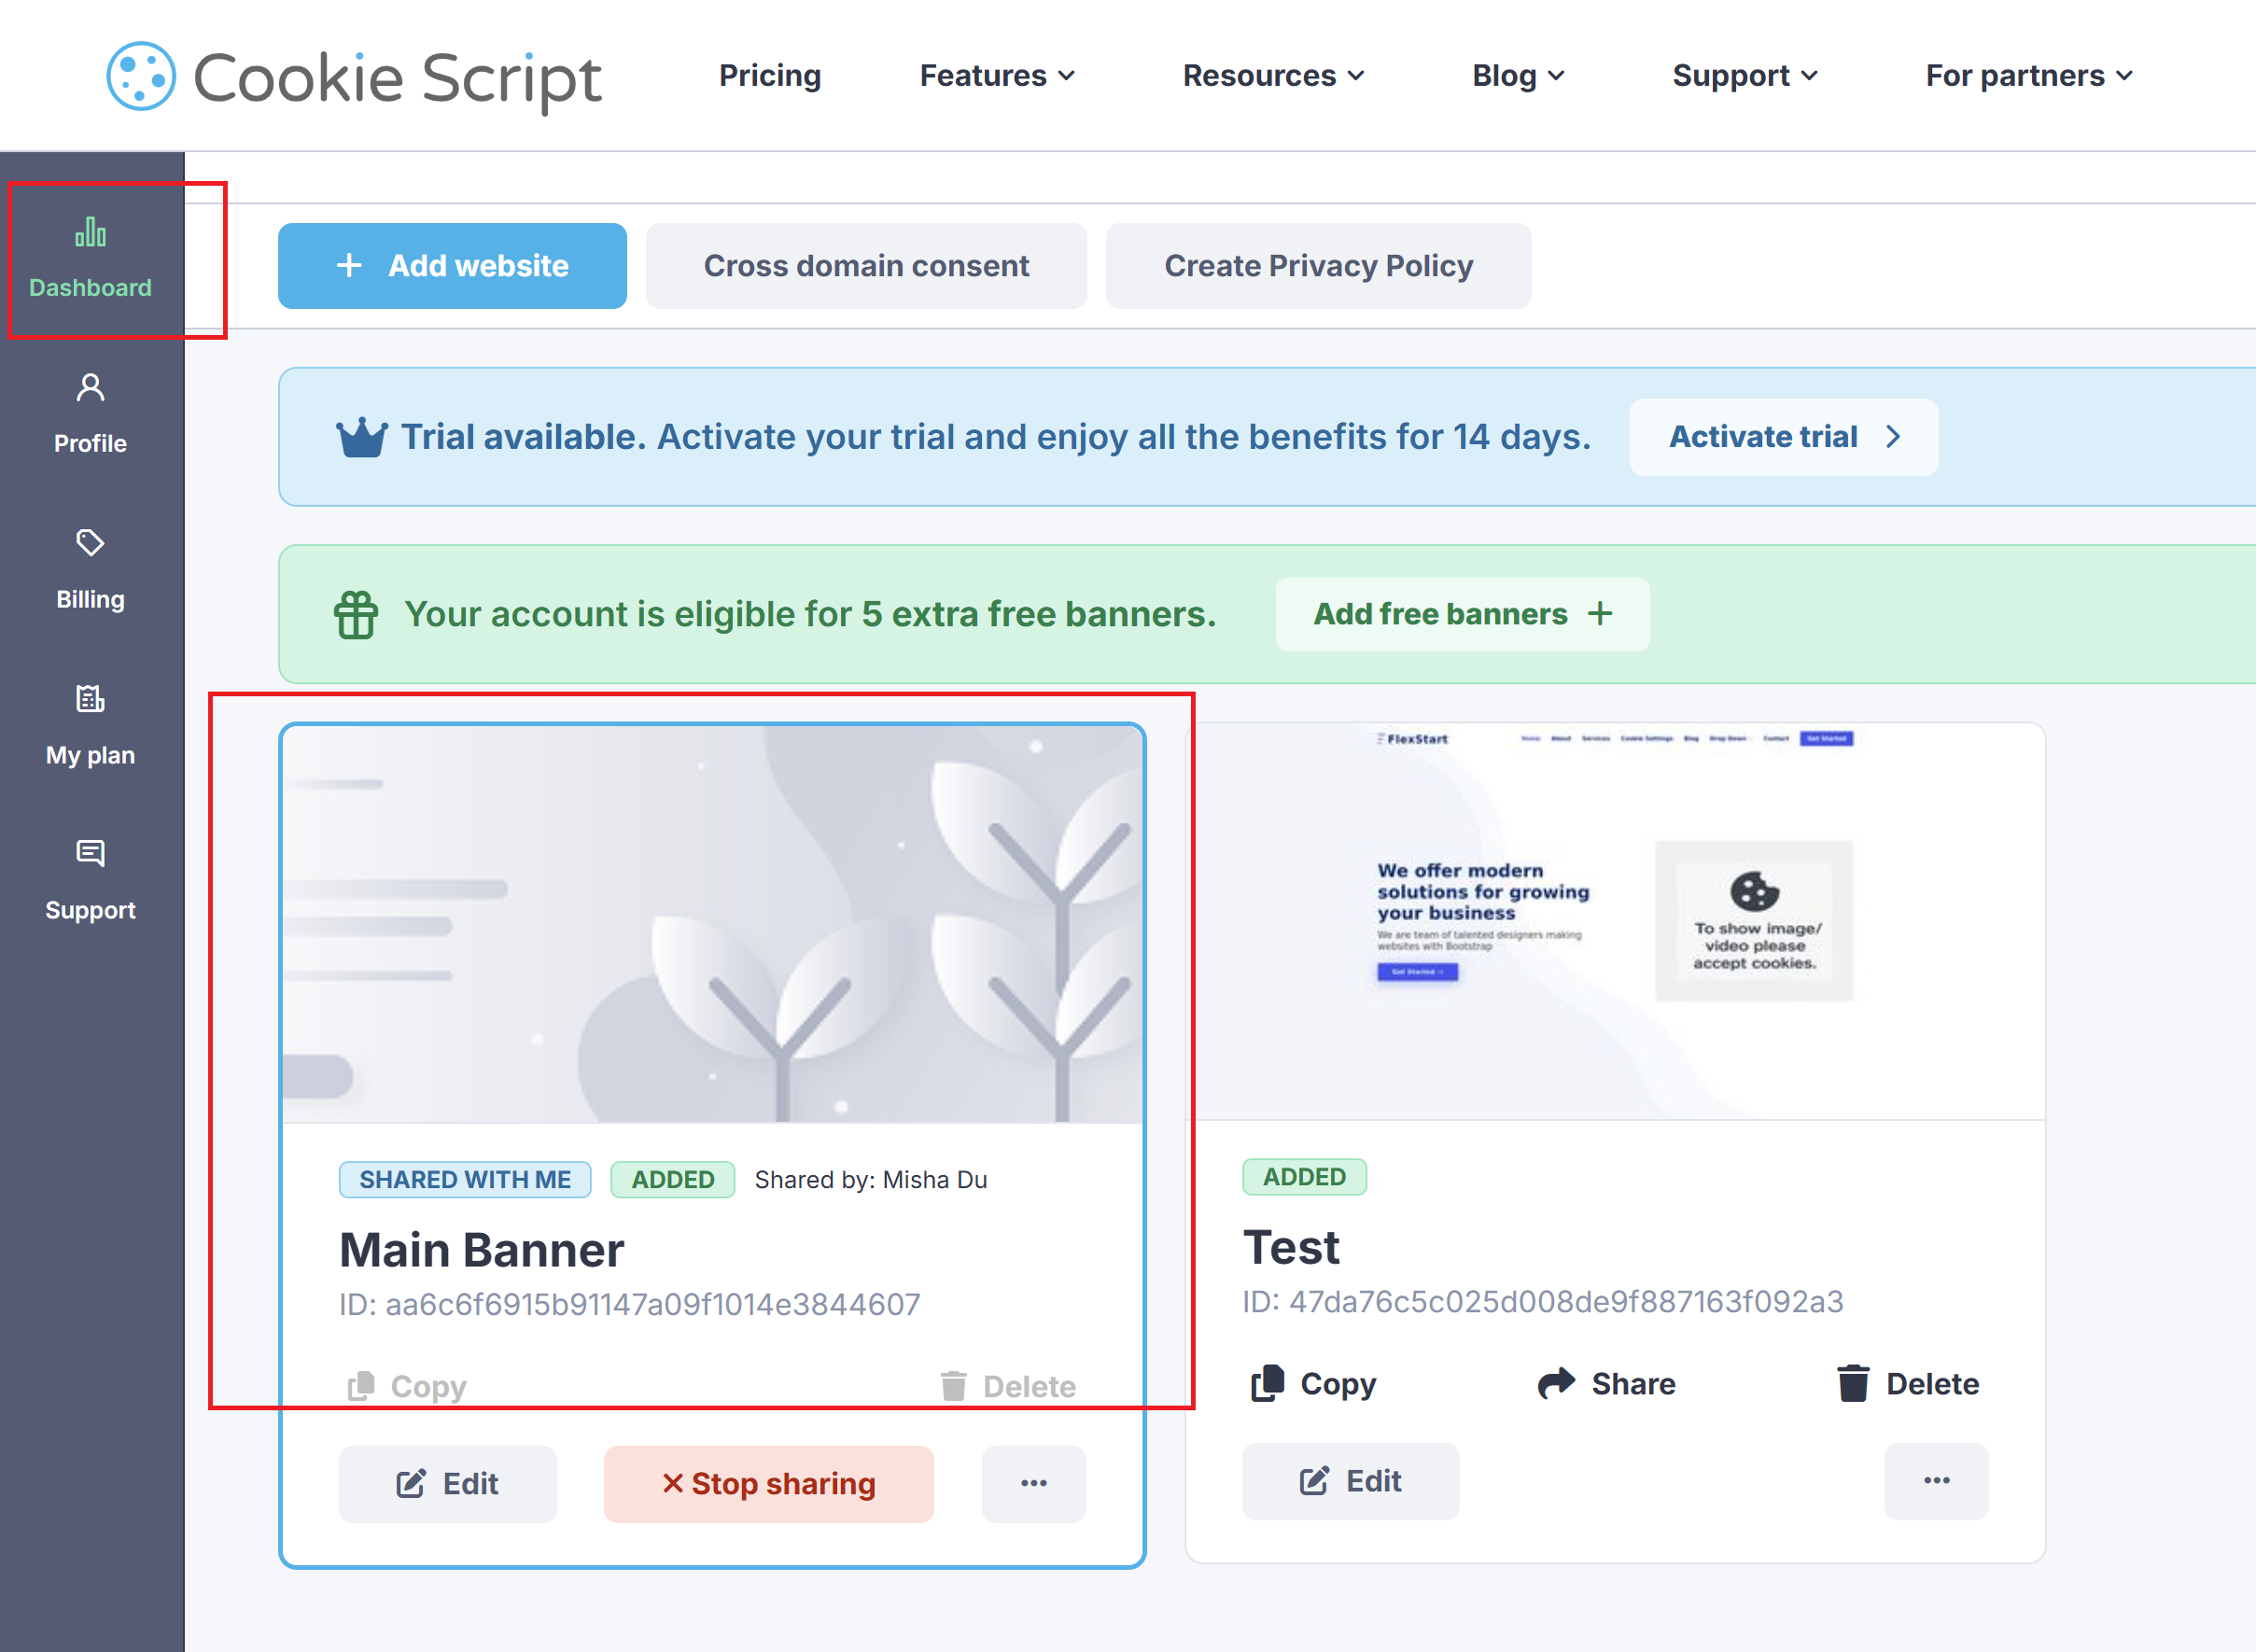
Step 1: Log In to Your CookieScript Account
Log in to your CookieScript dashboard and choose your banner.
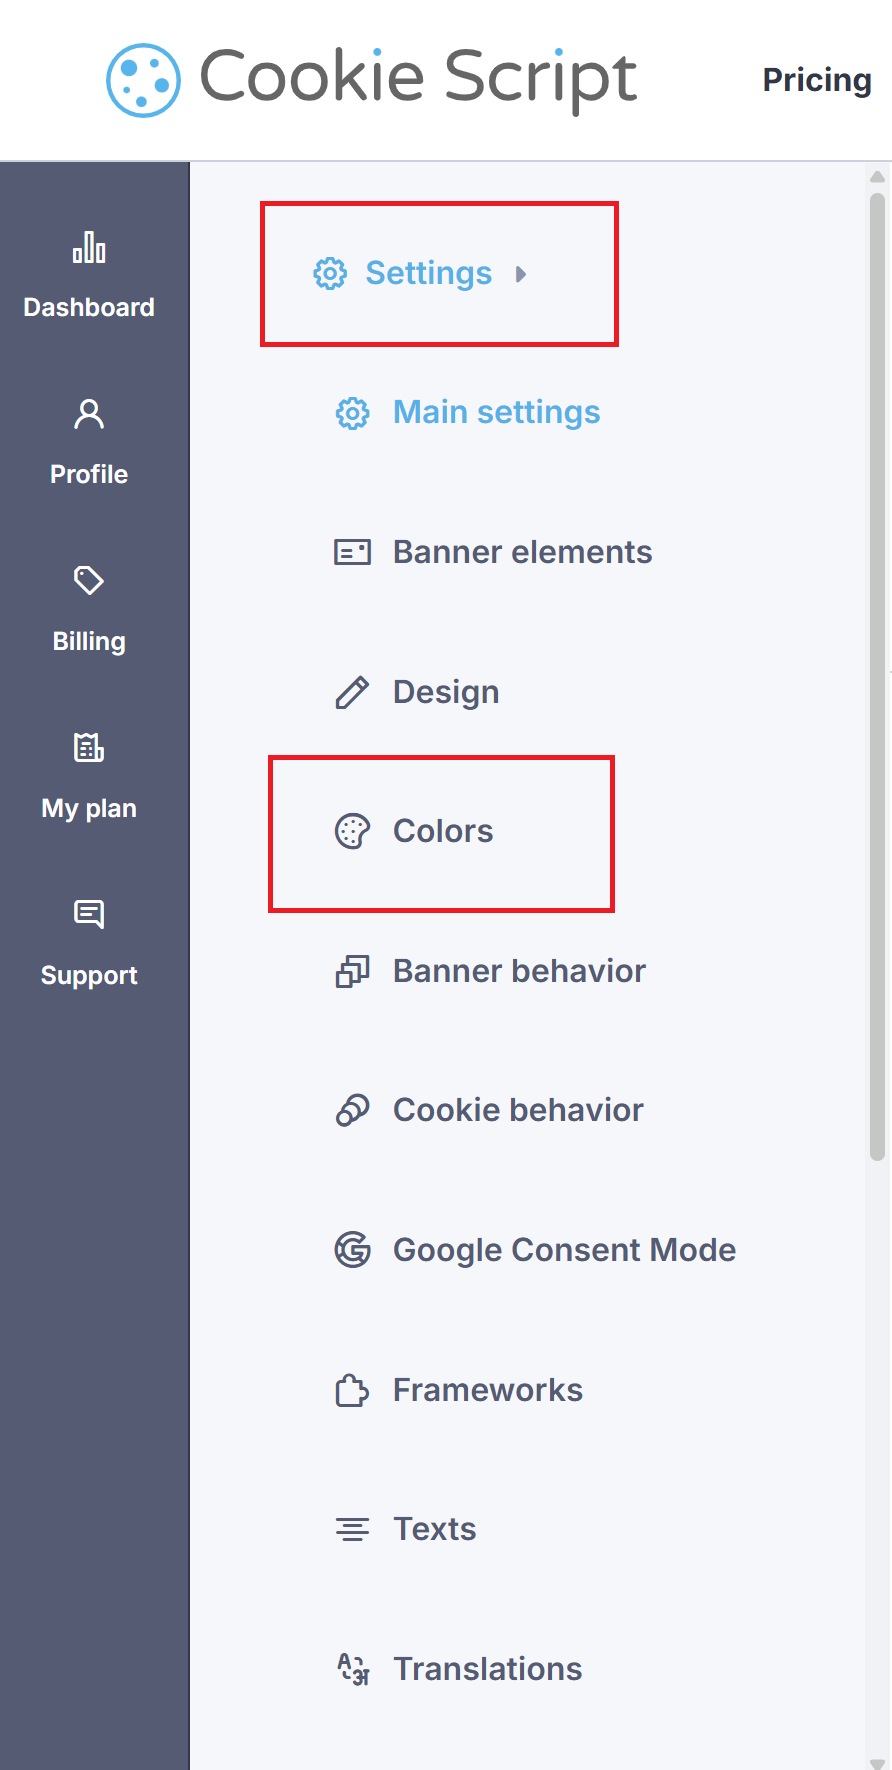
Step 2: Go to the Settings Menu
Open the menu on the left and head to:
Settings → Colors
Step 3: Locate the “Custom CSS Styles” Box
Scroll down until you see CUSTOM CSS STYLES.
That’s where you’ll put any custom styling.
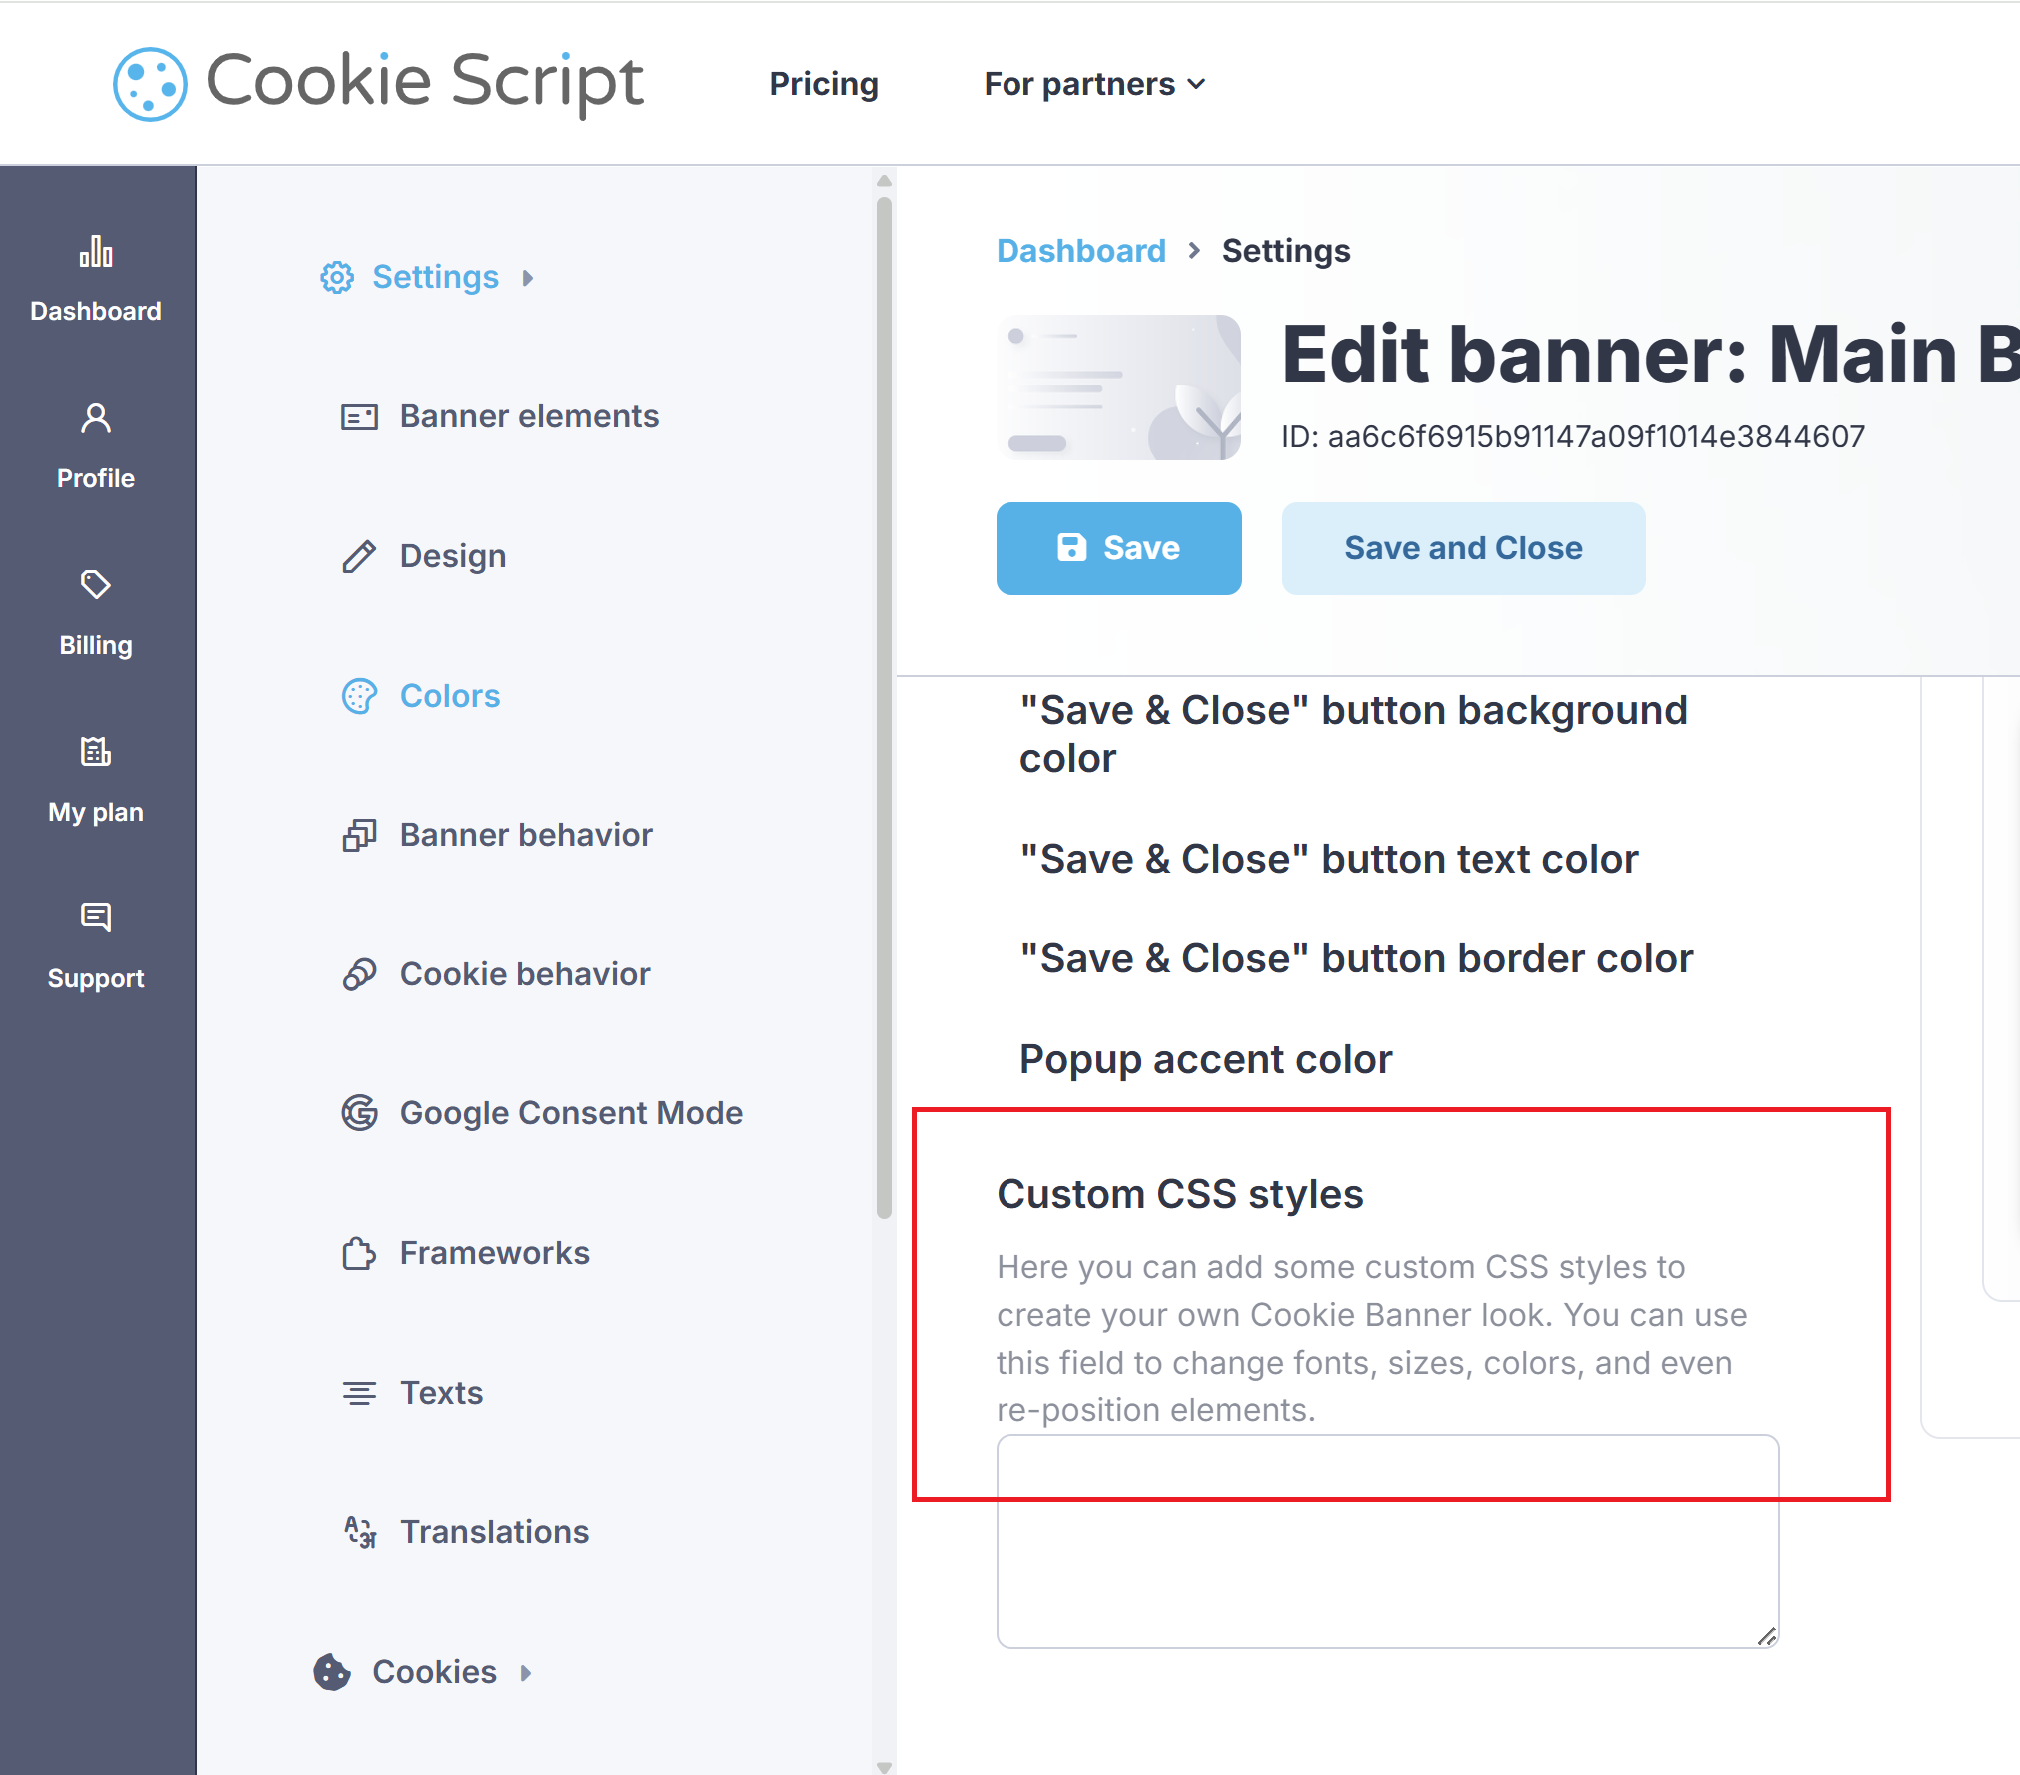
Step 4: Add Your Custom Styling
Add your styling rules in that box.
CookieScript will apply them on top of the default banner design.

Step 5: Save Your Changes
When you’re done, click Save so your banner gets updated.
Important Notes:
Custom CSS is loaded after the default CookieScript styles, so your changes can override the built-in look.
CookieScript does not offer services to write or debug Custom CSS. Any adjustments you add need to be created and tested on your end.